OpenVAS, an application used to scan endpoints and web applications to identify and detect vulnerabilities. It is commonly used by corporations as part of their mitigation solutions to quickly identify any gaps in their production or even development servers or applications. This is not an end all be all solution but can help to get rid of any common vulnerabilities that may have slipped through the cracks.
From the OpenVAS GitHub repository "This is the Open Vulnerability Assessment Scanner (OpenVAS) of the Greenbone Vulnerability Management (GVM) Solution. It is used for the Greenbone Security Manager appliances and is a full-featured scan engine that executes a continuously updated and extended feed of Network Vulnerability Tests (NVTs)."
As previously mentioned OpenVAS is built off the GreenBone Vulnerability Management (GVM) solution and is only one of the appliances that is released from GreenBone.
OpenVAS is a service within a larger framework of services known as Greenbone Vulnerability Management (GVM). In this task we will break down the services that make up the framework and their roles.
Above is a brief visual breakdown of what the GVM framework looks like. There are many components that are apart of the architecture for the GVM framework, but we can break it down into three distinct sections: Front-End, Back-End, and Vulnerability/Information feed. These sections are further explained below.
Vulnerability/Information Feed (NVT, SCAP CERT, User Data, Community Feed)
This section will contain all information and vulnerability tests that come from the Greenbone Community Feed that will be the main baseline for testing against systems. This can also include User Data provided by the user in place of Greenbone NVTs and SCAP CERTs.
Back-End (OSP, OpenVAS, Targets)
The back-end infrastructure is what will be actually conducting all of the vulnerability scanning and processing data and NVTS through OpenVAS and GVM. Greenbone Vulnerability Manager will be the middle man between the scanners and the front-end user interfaces.
Front-End (GSA, Web Interfaces)
This is what you interact with when you navigate to OpenVAS in your browser. The web interfaces are built off of the Greenbone Security Assistant and make life easier for an analyst or operator when working with OpenVAS or other forms of scanners through the GVM.
For more information about the GVM framework architecture check out this forum post https://community.greenbone.net/t/about-gvm-10-architecture/1231.
The installation procedure for OpenVAS can vary based on how you decide to install. You can install from Kali/OpenVAS repos, install from source, or run from a docker container. For our purposes, the preferred method is to run it inside a docker container as we don't have to worry about a lot of the setup or errors that we may run into with other installation methods.
This article explains how to install OpenVAS on Kali Linux. The difference between this method and others is the switch from “openvas” to “gvm” for naming/marketing. As you might have seen, I’ve written several articles on installing and using OpenVAS on CentOS. Don’t do it. Don’t go through the pain needed to get OpenVAS working stably on CentOS or anything RPM based. Skip it and use Kali Linux. Don’t get me wrong, I prefer CentOS/Fedora/RHEL for everything else, but not OpenVAS. Having just installed Kali Linux, do the following:
apt-get update
apt-get upgrade
apt-get install gvm
Now run the setup program. Go have a coffee because this takes a long time – even with a good Internet connection:👻😂
gvm-setup
Open the firewall allowing remote access to your new OpenVAS installation/server. Obviously this is optional and assumes you’re using your OpenVAS system as a “server” on some remote system as apposed to on your local workstation.
apt-get install ufw
ufw enable
ufw allow 80
ufw allow 9392
Start OpenVAS and access it on the local host “127.0.0.1”:
gvm-start
Start using OpenVAS as you normally would.😋😎
-------
Don’t bother trying to install OpenVAS. Instead, download the trial ISO image and use that. HowTo’s you’ve probably already read all discuss installing OpenVAS by compiling it yourself. It seems installing via package managers is a thing of the past. I hope this changes – or that i and so many others are wrong. But until then, use this method. Obviously you can just pay for it, in which case you’ll surely have a better experience. One hopes. Free Trial - Greenbone Networks

Requirements
Importing the GSM TRIAL
- Download the OVA file of the GSM TRIAL.
- Download and install Oracle VirtualBox for the operating system used.
- Start VirtualBox.
- Select File > Import Appliance… in the menu bar.
- Click
 and select the OVA file of the appliance in the file system.
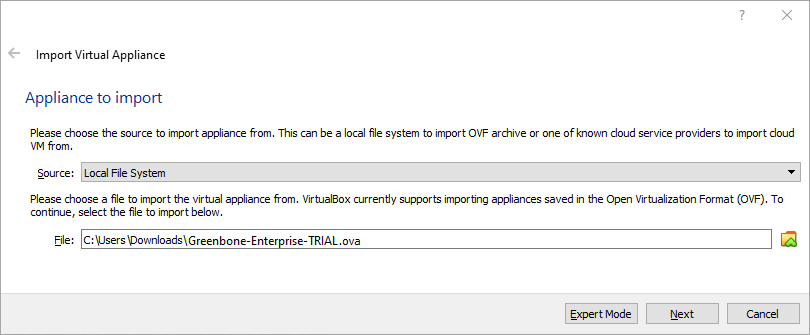
- Click Next.
→ The appliance settings are displayed.
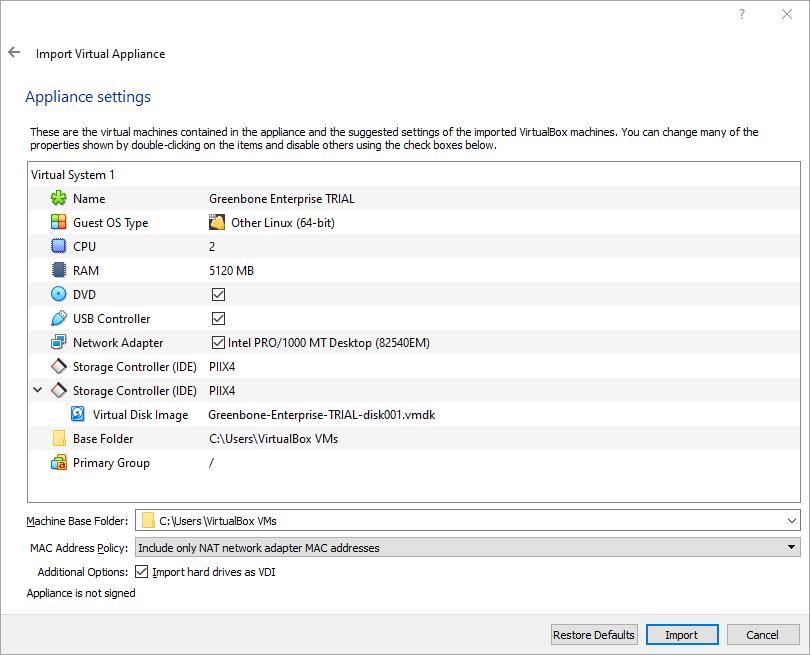
- Check the configuration of the virtual machine.
Values can be changed by double-clicking in the input field of the corresponding value. - Click Import.
→ The appliance is being imported. This process can take up to 10 minutes.
When the appliance has been imported, it will appear in the left column in VirtualBox. - Select the appliance in the list and click Start.
→ If an error message is displayed, continue with step 10.
If no error message is displayed, the GOS administration menu is opened and allows to proceed with the general system setup. - Select the appliance in the list and click Settings.
- Select Network > Adapter 1.
- Choose the correct network adapter in the drop-down list Name.
- Click OK.
- Select the appliance in the list and click Start.
→ The GOS administration menu is opened and allows to proceed with the general system setup.
Performing a General System Setup
- Log in using the following login information:
User name: admin | Password: admin
→ When logging in for the first time, the GOS administration menu displays the First Setup Wizard to help with the basic configuration of GOS.
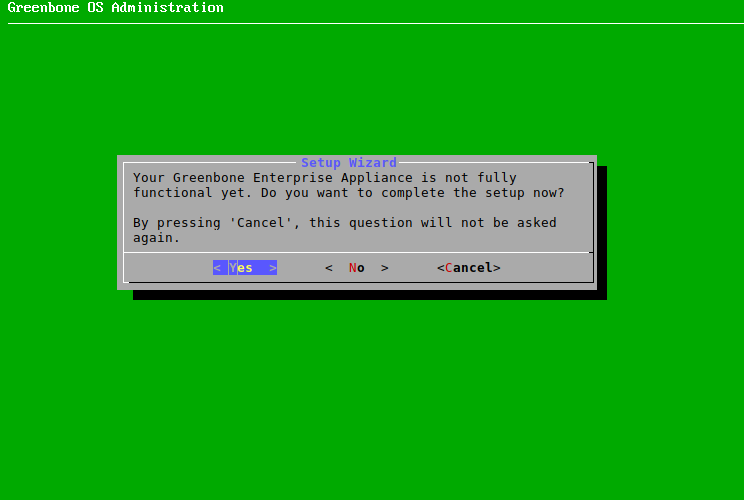
- Select Yes and press und Enter to open the Wizard.
Note: The wizard can be closed by selecting No and pressing Enter. Steps that have not yet been completed will be displayed again at the next login.
The wizard can also be closed by selecting Cancel and pressing Enter. In this case, however, incomplete steps will not be displayed again.
Any step can be skipped by selecting Skip or No and pressing Enter. Skipped steps will be displayed again at the next login.
→ It is asked whether a web user should be created. This is required to use the web interface.
Note: The first web administrator (web user) created is automatically the Feed Import Owner (more information about the Feed Import Owner
here).
- Select Yes and press Enter.
- Enter the user name of the web administrator.
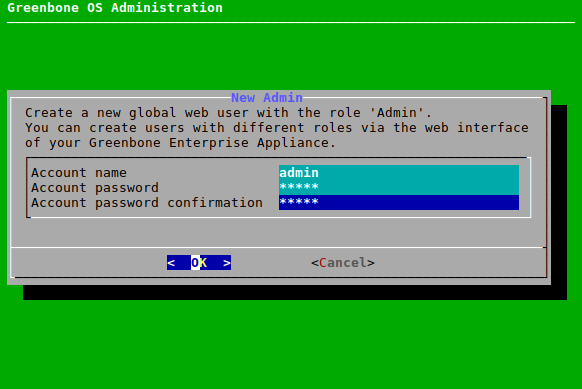
- Enter the password of the web administrator twice.
- Select OK and press Enter.
→ A message informs the user that the web administrator has been created. - Press Enter to close the message.
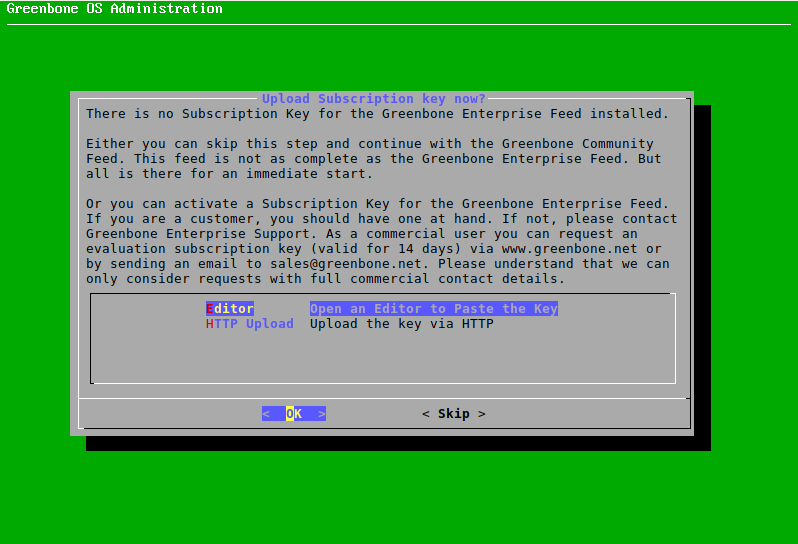
The key can be entered or uploaded as follows:
- Select Editor and press Enter.
→ The editor is opened. - Enter the GSF subscription key.
- Press Strg + X.
- Press Y to save the changes.
- Press Enter.
or
- Select HTTP Upload and press Enter.
- Open the web browser and enter the displayed URL.
- Click Browse….
- Select the subscription key in the file system.
- Click Upload.
→ A message shows that the key has been imported successfully. - Press Enter.
After the last step, a status check is performed. A message shows the result.
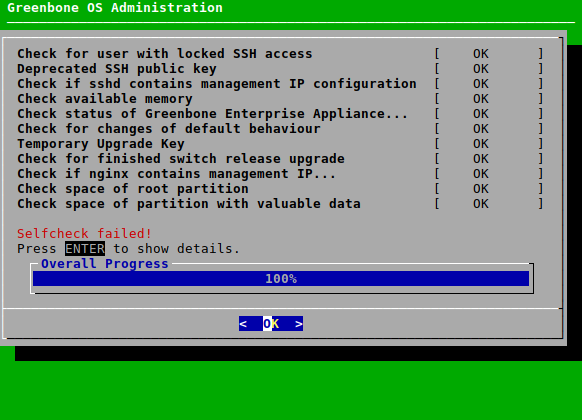
Note: After closing the message by pressing Enter, the GOS administration menu can be used
as described in the user manual.
If there are any incomplete or skipped steps, the First Setup Wizard will reappear at the next login.
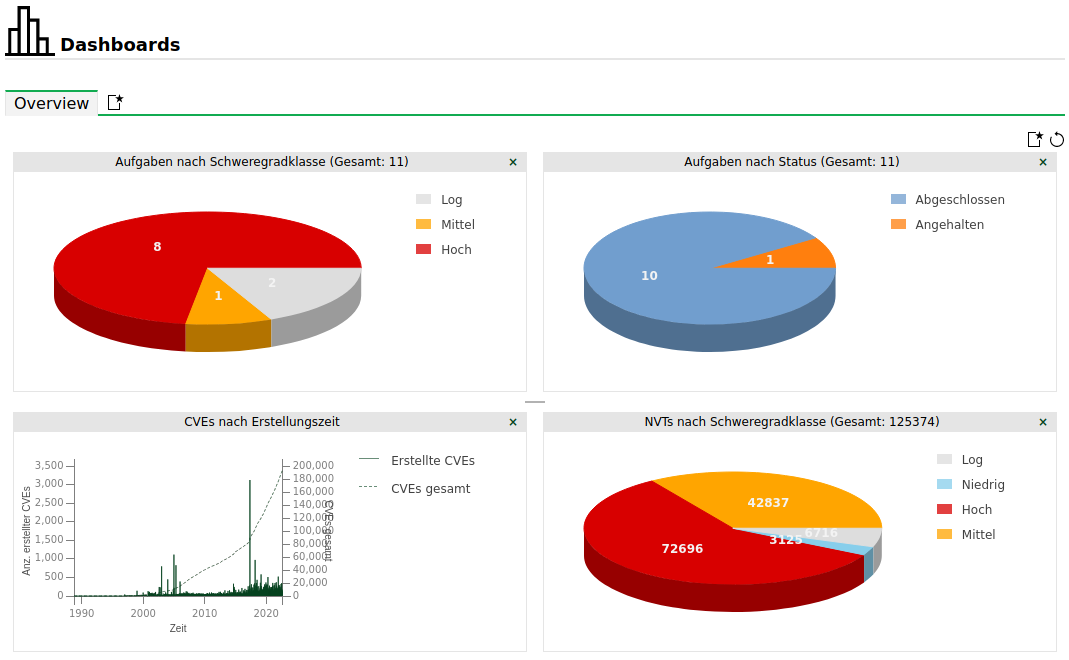
Accessing the Web Interface
The web interface can be accessed as follows:
- Open the web browser.
- Enter the IP address of the GSM’s web interface.
Note: The IP address of the GSM’ s web interface can be displayed as follows:
- During the login to the GOS administration menu
- By selecting About and pressing Enter in the GOS administration menu
- Log in with the web administrator created during setup.
→ The web interface is opened.
Additional Notes
- It is recommended to change the password of the GOS administrator as described in the user manual.
- The GSM TRIAL uses a self-signed TLS certificate. When logging in to the web interface, this is considered insecure by the web browser and must therefore be added to the web browser as an exception.
- Shutting down or restarting the virtual machine should only be done via the menu option Maintenance > Power in the GOS administration menu to ensure that important system processes, such as the feed update, are not interrupted.


